
It was a Saturday morning and thick cumulus clouds rolled above the city. Don’t typically do too much on a Saturday. Mostly consists of journaling, listening to music, studying, walking around, peeping into the fridge several times, and thinking I should hit the gym without ever going. Wanted to challenge myself in the kitchen and knew that whether it was a fail or success, I’d eat it anyways because I eat just about anything. Been wanting to make a roll cake but never actually had the drive since it seemed so damn complicated but it had begun to pour outside so rather than laying in bed and letting R&B music give me the feels, I took out flour, sugar, chocolate, and eggs and got to mixing.
Crap.
I was missing ingredients, but whatever, my ingenuity will pave the way through this dessert. Also, I had already begun so there is no turning back. I knew that I wanted to work with chocolate and vanilla, and that the cake had to be sponge-like, so a meringue was a must. Didn’t have heavy cream to make a chocolate ganache so I ended up making a wannabe ganache using cream cheese and it somehow tasted… better than a ganache? (inserts side look emojis), if you know you know… So how did I cluelessly make a successful roll cake? Here are some important tips to know:
Tips:
- Let the cake cool completely before rolling to prevent cracking.
- Set the roll cake in fridge for at least an hour before serving.
- Meringue must reach stiff peaks.
- A piping bag helps with smooth texture.
Seems like you’re ready to bake so let’s get to the recipe
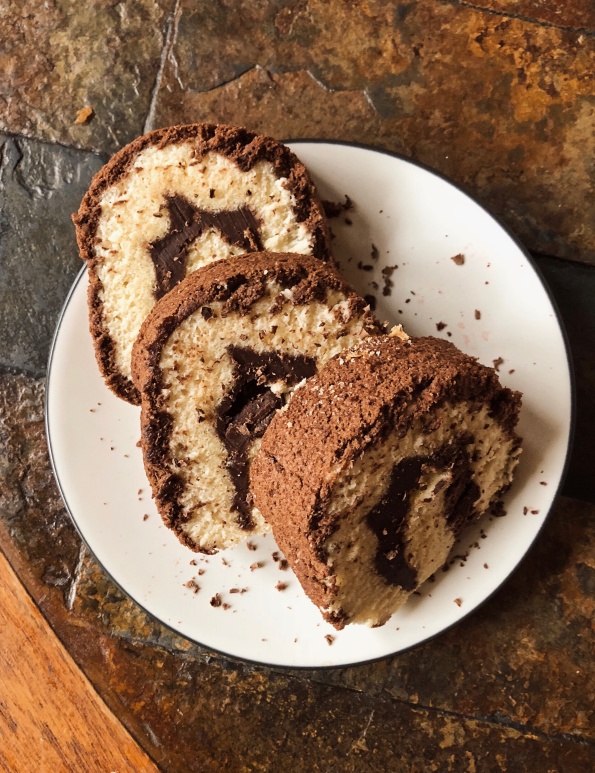
Two-Tone Swiss Roll
yield: 10 inch roll
ingredients:
For Cake:
- 4 eggs (separated)
- 1/8 tsp. cream of tartar (optional)
- pinch of salt
- 4 tsp granulated sugar
- 1/2 tsp vanilla extract
- 3 tbsp. vegetable oil
- 1/4 c. 2% or whole milk
- 2/3 c. cake flour (make your own HERE)
- 1/4 c. granulated sugar
Chocolate mix:
- 1 tsp cocoa powder
- 1 1/2 tbsp milk
For ganache:
- 1/3 stick of 8 oz. cream cheese (approximately) (softened)
- 3 tbsp. unsalted butter (softened)
- 1/3 c. semi-sweet chocolate chips
Tools needed:
- piping bag OR sandwich bag
- rectangular cake pan or cookie sheet (I used 9 x 9 x 2 inches)
- parchment paper
- sifter
Directions:
- Line cake pan with parchment paper and preheat oven to 345F.
- In a large bowl whisk egg yolks, 4 tbsp. sugar, and vanilla extract together.
- Add in vegetable oil and milk and whisk until combined. Then sift in all the cake flour and quickly whisk together.
- In a medium glass or metal bowl, beat egg whites, cream of tartar, and gradually add in sugar until stiff peaks form.
- Using a spatula, transfer the egg whites into the yolk mixture in 4 batches and fold in until evenly incorporated. Do not deflate the egg white, be very careful.
- In a small bowl, whisk together cocoa powder and milk until a viscous chocolate paste forms.
- Transfer half of the batter into the medium bowl and fold in the chocolate paste.
- Pour the white mixture into the cake pan and pour the chocolate mixture into a piping bag. Pipe the chocolate mixture on top of the white mixture. I like to pipe in strips and making sure the chocolate mixture completely covers the white mixture.
- Bake in the oven for 22-25 minutes.
- Microwave the cream cheese and butter for 30 seconds. Add the chocolate chips. The butter and cream should be hot enough to melt all the chocolate. If not, microwave the mixture for about 10 seconds.
- Once the cake has finished baking, let it cool at room temperature for about 15-20 minutes.
- To assemble the cake, make sure the chocolate side is facing the bottom and spread the ganache on the white portion of the cake. Use the parchment paper to roll the cake tightly. Once rolled, seal the sides of the parchment paper up like a tootsie roll and place in the fridge for at least an hour.
- Serve with whipped cream, ice cream, chocolate shavings, or other sweet delicacies.
And that was my Saturday summed up in this recipe post.
Enjoy!

Leave a comment